• Home
  • Disclosure Policy
  • My Pets/Pet Products Reviews
  • About Me/Media Kit
  • Movies/Entertainment
  • Aging/Disability
  • Fashion/Beauty
  • Recipes/Kitchen Reviews
  • 2025 Holiday Gift Guide
  • #Pittsburgh’s Kennywood & Sandcastle Discounts & Reviews

Tammie's Take~

Sharing The Best/Worst Of My World and Pittsburgh, Too

You are here: Home / Home

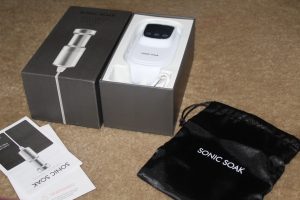
Sonic Soak Ultrasonic Cleaner #Review @sonicsoak

Reviews · April 26, 2019

I received the below mentioned complimentary product either for free or a discounted price for the purpose of this post. All opinions and thoughts are 100% my own.

Is it possible to have a germ free home, office or even clothes? I was thrilled when the opportunity came about to review The Sonic Soak. I never knew that something like this product even existed on today’s market. So, Now I can’t wait to try it and see if it really does what it says it will……About The Product~

Does it really work?

Yes, it really does. Ultrasonic technology has been used for years in medical and industrial applications and has proven to provide unparalleled cleaning results. We’ve harnessed this technology and compacted it into this sleek package using a stainless steel exterior to ensure that the Sonic Soak does what it promises. Not to mention, in addition to lab testing, we’ve meticulously tested the Sonic Soak on our own clothes, accessories and even ourselves.

What is this ultrasonic technology you speak of?
Ultrasonic technology comes as a result of ultrasound, an oscillating sound pressure wave that operates at a frequency beyond the human range of hearing. In water, these powerful waves produce a process called cavitation which creates bubbles that do the cleaning. This technology has been used for years in medical and industrial applications as a means of truly powerful cleaning, but Sonic Soak has scaled it down and made it accessible to the average consumer.

What do I need to make Sonic Soak work?
All you need is a clean container of water and connection to electric power.

What kind of container do I use to wash my clothes?
You can use a sink, a bucket, a bowl, even a plastic bag. Anything that can safely hold water would work. Sonic Soak is not picky.

What do I do with my clothes after using Sonic Soak?
Sonic Soak has the cleaning part covered, so the next step would be to rinse and dry, and your stuff is all set to be worn again the next day.

How much laundry can I wash in one load?
We recommend washing up to 4 lbs worth of items. Heavier items like jeans and bedding are not recommended for use with Sonic Soak.

Can the Sonic Soak replace my washing machine?
For frequent travelers and small households and families, Sonic Soak is the perfect washing machine replacement. It’s perfect for helping you save on water, space, and energy – especially if you don’t have large loads of laundry.

What’s the difference in quality between using Sonic Soak and washing in the machine?
Thanks to ultrasonic waves that reach clean at the microscopic level of your dirty items, Sonic Soak can reach areas your washer can’t. In the end, you get clothes that are not only much cleaner, but also gently washed without all the banging and sloshing from the washing machine.

 My Review/Thoughts~

So, I really was looking for a safe and easy way to clean my fruits/vegetables and delicates and beleive it or not but an easy and quick way to clean my fruits, Vegetables or even my delicates  and I now know I have found it. The Sonic Soak is the single biggest Innovation in Cleaning. The best ultrasonic cleaning device limited only by your imagination. It is also the worlds smallest washing machine. Sonic Soak can clean it all. It gets your items 99.9% clean. I also love that it comes with a drawstring bag to keep everything in one place. What I did notice is that my family does not get colds like they used to. It was a breeze to use as soon as I took it out of the box. Eric immediately wanted to try it on the vegetables he planned to make for dinner. Eric stated that he thought it was awesome to use and it blew his mind away because the Sonic Soak is a product that actually works.

I highly recommend the Sonic Soak and I know you will love it, too. You can go HERE to purchase one for yourself. I give the Sonic Soak my seal of approval.

Full Body Bed Pillow #Review

Reviews · April 23, 2019

I received the below mentioned complimentary product either for free or a discounted price for the purpose of this post. All opinions and thoughts are 100% my own.

My Doctors told me not to lay on my back or stomach when I sleep but that is exactly what I am used to. They suggested I get a body pillow to fix this. This is why I was thrilled when the opportunity came about to review the Full Body Bed Pillow by Insen.

About The Product~

  • SUPER SOFT JERSEY COVER. Premium pillow cover in navy blue makes you feel amazing and very comfortable. You will be impressed by its soft, silky, and skin-friendly. This luxurious full body pillow serves both texture and beauty.
  • OVERSIZED FOR TOTAL BODY SUPPORT. Measures 54’’x20’’, oversized for perfect fit. Our full-sized bed pillow takes place the multi small pillows in bed. This comfortable body pillow is long enough and making it a best assistant for expectant mother, back/side sleepers.
  • WELL MADE AND MULTI-USE. You need support in daily sleep, sit, and lie down. This full body support pillow fit the natural contours of the body. Please fully relax yourself when you are reading, watching TV/movie, working and playing games while sleeping with it. Besides, take this navy-blue color pillow in bed is so beautiful and show your room energetic.RELIEVE PREGNANCY BODY PAIN. Our full body pregnancy pillow can help you into a quality sleep, reducing interruptions all night.
  • EASY CARE WITH ZIPPER COVER. Machine wash and tumble dry the body pillow for easy care. More durable and maintain original shaped. High density soft cotton adapts to your belly and back when you want to sleep, read, nurse, or watch TV. We use long silk cotton that it will stay smooth and fluffy inside the pillow provides comfort for side support.
  • 100% REFUND GUARANTEE. 100% REFUND GUARANTEE. INSEN provides 90-day REFUND or exchange GUARANTEE. Your satisfaction is our top priority. Please feel free to contact us if you are not satisfied with the pregnancy pillow. Warmly Tips: Both outer and lining case have independent zipper for you conveniently to unpick and wash or stuff regulation.

My Review/Thoughts~

When the pillow arrived, I could not fathom how the Body Pillow could make a difference but I was willing to give it a try. I was so very scared not to be able to sleep on my belly but I used the Body Pillow. The first night was an adjustment night- Getting used to the pillow, etc. The second night went much better but not perfect as I kept waking up. The 3rd night was the night. The Body Pillow was the trick to keeping off of my belly. It is really very comfortable and I can’t imagine sleeping without it. This Body Pillow was the answer to my prayers. I highly suggest the Body Pillow for anyone needing to get a great nights sleep.

I highly suggest the Body Pillow and give it my seal of approval. You can go HERE to buy one for your very own.

5 ways to try and manage muscle pain

Reviews · April 23, 2019

Muscle aches are one of the most common problems to afflict people across the world. Because there are muscles all over the body, they can strike virtually anywhere, and the seriousness varies from a little twinge to pain so incapacitating that you are physically unable to move.

How to treat muscle pain will depend a lot on the type of injury you’ve sustained, it’s severity and the location on the body. What’s good for a problem in the neck might not necessarily work as well for a lower leg issue such as a calf problem.

There are however some methods of relieving muscle pain that can help no matter what the problem.

  1. Stretch the affected area

Muscle pain can be caused by spasms and tightness, in which case you need to stretch the affected area. This will not only help relieve pain, but it will also help build up strength and as a general rule, the stronger the muscle, the less susceptible it is to suffer from random aches and pains. If you aren’t sure where to start when it comes to stretching, then check out these science approved stretching techniques for better mobility and less pain.

  1. Apply ice or heat

Depending on the signals that the affected area is giving off, then ice and heat treatment can help to manage muscle pain. If there is noticeable swelling or the muscle feels warm, then wrap an ice pack inside of a thin towel and leave it on the affected area for 15 minutes. Never put ice directly onto the skin. If there isn’t any swelling and it’s just sore, then instead apply a heat pack for 15 minutes. Warming up the muscle will boost blood circulation and the more blood you can get pumping into the damaged muscle, the better.

  1. Take a warm bath

If the heat pack hasn’t worked, then you need to take the treatment onto the next level and sink into a nice, warm bath. Not only does a bath wash away the dirt of the day, but it also washes away stress by relaxing all the muscles in our bodies, which can feel like heaven if you’re suffering from muscle pain.

  1. Herbal remedies

Herbal remedies have long been used in the treatment of muscle pain with varying degrees of success. Chamomile contains 36 different flavonoids which have anti-inflammatory properties, and cayenne pepper relaxes muscles and has even been recommended to those suffering from rheumatoid arthritis. Other herbs and plants that might be worth a shot include blueberry, cherry juice, turmeric and kratom which is available from The Kratom Connection.

  1. Do light exercises

You might think that the only way to get over muscle pain is to rest the affected area and let it recover. In some instances, this can actually make the problem a whole lot worse. You might be suffering from muscle tightness, knotting or if you are a relatively active person, lactic acid builds up. Lightly exercising the muscles by walking, swinging your arms around or moving your head from side to side can loosen everything up and alleviate those particular problems.


The Beginner’s Guide to Making Beer from Home

Reviews · April 17, 2019

Brewing up a new batch sounds a lot harder than it actually is, fortunately, and today we are going to prove that fact by going through a step by step guide to making beer at home.

The Ingredients You Will Need

Water

One can’t make beer without water, of course, but the water needs to be drinkable and shouldn’t have a high concentration of sulfur, iron, chlorine or bicarbonates by any means. If you are not sure about the tap water in your area for some reason, just use bottled water for the brewing to be safe.

As water plays a huge part in how the taste of the beer, advanced brewers tend to alter the chemical composition of the brewing water by adding minerals in the right proportion. As this would be your first batch, sticking with plain bottled water or distilled water is the best way to go.

Barley

Barley is necessary for the sugars it has, but we can’t just be using any barley out there, as it will not have the sugars and starches in the right quantities and proportions, which is necessary to brew beer.

You should be looking for malted barley, which are the grains specifically steeped and dried for brewing by professional malting companies. The ratio will differ when you mature and gain experience as a brewer, but for now, let’s go with the tried and tested 1:2 rule, which states that every gallon of water requires two pounds of barley.

Do try to buy malted barley grains that are already milled for your first batch though, or you will have to take them to a brewer who has the milling equipment necessary. You could invest in one if you want to, but the good ones are really expensive, and it may not be ideal to spend so much money even before you have learned how to brew your first batch.

Hop

Hop is readily available in the market, but we recommend getting an aromatic species of the hop flower if you can, as it adds a distinct floral flavor to the batch. For the most part, though, the primary job of the dry hop is to make your beer just bitter enough so that the taste counteracts the sweetness of the barley. As an additional benefit, adding hop will prevent the concoction from getting spoiled easily, which could otherwise be a real problem under certain weather conditions.

The Yeast

Your mix will not turn into beer unless you add this fungus because the microorganism is pretty much what will turn all that sugar into the drink we all love. While there is no lack of yeast species bred specifically for making beer in the world, the German Kölsch yeast is highly recommended. It will heighten the bitterness and the flavor of your hop, and your batch will turn out to be crisp just like the Kölsch lager it was used originally in Germany to brew. You can check for more info here on the White Labs website.

The Brewing Process

The Mashing

Put the malted barley in hot (not boiling) water to extract the sugars from the grains. Once the sugars have been completely extracted (as best as you can tell), the mash is complete.

The Boiling

After the sugar has been extracted, it is time to get rid of grains from the water and raise the heat until it starts to boil. Now, here’s where your steps will differ a bit, depending on the kind of hop you are using, but since we are using aromatic hops, you will allow the water to boil for an entire hour and once the heat has been turned off, only then should the hops be added to the water.

The Cooling

On boiling it for an entire hour, what you have right now is known as wort, which requires cooling to the perfect pitching temperature, and that is the hard part if you are not equipped properly since it has to be done under half-an-hour at the latest.

A common homegrown method is that of putting the boiling pot in a sink full of icepacks or just plain ice to cool it down quickly to a temperature that is ideal for pitching the yeast. As we are using the German Kölsch yeast for this batch, the pitching temperature you are looking for should range in between 18°C – 20°C (65° – 69°F).

Pitching the Yeast

Once the pitching temperature has been attained, it is time to pitch the yeast, which is a brewer’s term for adding the fungus to the wort. Transfer the wort into your choice of fermenting vessel first and then add the yeast to it. Seal the fermenting vessel with everything in it and put it away in a dark and cool place in the basement or the garage. Make sure that the place is dry as well because moisture will ruin your brew.

Wait for Two Weeks and Your Beer Will be Ready for Bottling

It generally takes two weeks for the yeast to consume all the sugar in the water and turn the entire thing into beer, but without the bubbles.

Put the beer into a bottling bucket and add a tiny bit of plain old cane sugar to the beer before sealing the lager inside individual beer bottles. Once again, store your beer bottles away in a cool and dry place and wait for a month. When you return to the bottles after a month, the fungus will have completely carbonated the beer by eating up all the cane sugar in the bottles. Each bottle is now ready to be opened and enjoyed.

Being completely newbie friendly, hopefully, this little guide will help you enough to at least get started on the right path. It will certainly not make you an expert at it, as only time and experience can get you there, but if you are careful with the steps and use good ingredients, even your first batch will likely turn out pretty good. Just in case it doesn’t though, learn what you can from it and start on the next batch as soon as possible.

Loving Pets Dog & Cat Toys #Review @LovingPetsCorp

Pets, Reviews · April 17, 2019

I received the below mentioned complimentary products either for free or a discounted price for the purpose of this post. All thoughts and opinions are 100% my own.

My pets are my family and because they are my family I treat them like family. I make sure they have the perfect food, The perfect treats and of course the perfect toys to play with. I was beyond thrilled when I received a box of assorted Dog and Cat toys from Loving Pets. I was so very pleased to receive an under table scratching post and a Dizzy Thing that is motion activated. I also received 2 different Dog Ropes with a plastic covering some of the rope to make it more durable.

The Cat Toys~


The picture on the left is of  Dizzy Things cat toy that is motioned activated and twirls its feathers enticing the cats to play. The picture on the left is a picture of a scratching post that is perfect for under the table. Not only is it perfect for the cats to scratch on but it has feathers for them to pay with.

The Dog Toys~

The reason I had to take this video from the ground is that every time I tried to take a video of them at close range or in the same room, They thought I was the toy…..

If you ever thought about getting your puppy/Dog a rope product toy, I highly suggest any thing from GoDog as they are durable and highly interactive. I have not found a toy that my Dogs did not love. I cannot beleive how much seeing them play with toys just pulls at my heart strings. They really are comical.

This is where dogs and cats differ. My cats need whirly twirly toys which grab their attention. They stop dead in their tracks when they see a feather fly thru the air. Like I said before, My pets are part of my family and I treat them as such. Your pets will love any Loving Pet toy. I support this statement.

  • « Previous Page
  • 1
  • …
  • 62
  • 63
  • 64
  • 65
  • 66
  • …
  • 177
  • Next Page »

Categories

My Favorite Links

Discover Inflatable Planets Today

Environmentally friendly Takeaway Packaging here

Affordable Turnout rugs for your horse

Best spa breaks in the UK

Best wedding cars surrey has to offer

Dynamic Fireworks For Sale UK

Design by SkyandStars.co

Copyright © 2026 · LovePeace Theme by SkyandStars on Genesis Framework · WordPress · Log in